Lynx
Raiders of the Lost ROM part 5
At this point, I have a confession to make. I could not have done all this ROM hacking as quickly as I did without the partial source to Quadromania. Being able to see variable names, subroutine names, and the few odd comments here and there was an immense help. There are other Atari Jaguar/Lynx ROMs including Total Carnage, Centipede, and Loopz which I have hacked — ahem, upgraded — without the benefit of any source code. That’s a really painful but strangely satisfying process, and the best thing I can recommend to fellow ROM raiders in this situation is finding joypad input and using that to identify main blocks of code: title screen, options screen, in-game, etc. Then you can proceed to make surgical hacks to modify in-game behaviors or graphics.
Now that my conscience is clear, let’s move on. Today, we’re talking about level hacking. This is of course specific to Quadromania, so there aren’t as many new debug techniques I can share that haven’t already been covered in previous blog posts. So what I’d like to do instead is focus on how I leveraged basic Python programming as part of my ROM raiding, and frame it in the context of modifying the levels in Quadromania.
In Quadromania, the goal is simple: destroy colored square blocks in a 10×12 playfield by matching at least four in a row (quad, get it?) with falling colored bombs you control. Each level has a unique layout; in fact, each level actually has four unique layouts, one of which is randomly selected when you start the level.
Since the playfield is 10×12, that’s potentially 120 unique locations on the field for the blocks. And since the blocks can be one of three colors, each level has a pretty simple encoding of block color, block location in ascending block location order. You can have one block or a hundred and one blocks in your level, thus each level is variable length. A sample level looks like this in assembly:
| .BYTE 1,40,2,46,1,50,3,52,2,59,1,64,1,69,3,78,1,81,2,86 |
| .BYTE 2,96,1,111,2,113,3,116,3,117,0 |
The first byte is a 1 = green block with a location of 40 decimal (that’s first position of the fifth row, counting from the upper left corner of the playfield). And so on. By comparing the source and the ROM, I was able to identify a unique string of bytes only found in the matching level, so I knew I was in the right location. Even better, I found some offsets indicating the levels were all referenced by pointers, which meant I could not only change the bytes within a level, I could actually expand or contract a level as long as I updated the corresponding pointer.
Some of the original Quadromania levels were really tough. I consider myself at least an average player, but I was dying in a matter of seconds on some of these levels because the bombs were falling too fast and there were too many blocks crowded in the center of the grid. So I wanted to adjust those really hard levels to at least make them solvable. The problem: it would be super-tedious to hand-edit each of those levels, recompile the code, and try out on an emulator or real Lynx to see how it plays. The build/test loop was simply going to be too time-consuming. That’s when I started thinking about how to script the level editing process.
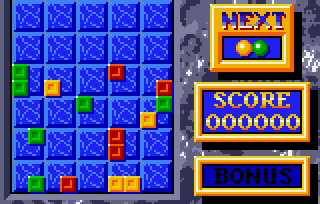
The above example level was a fairly simple level, and looks like this in the game:
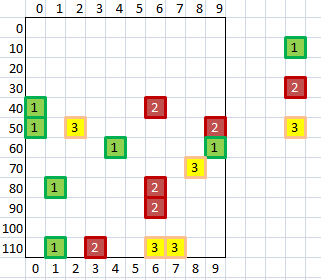
To capture a view of the level somewhere between the final game look and the raw bytes, I came up with a spreadsheet approximation:
If I was more of a spreadsheet wizard, I probably could have gotten Excel to spit out some formulas based on scanning the cells and linking all the values together into either a CSV or hexadecimal format. But that still would be a little painful, so I turned to Python. Or rather, I turned to my son who knows Python, as I had never written a line of it until the past few months. I showed him the above Excel graphic, and gave him a few sentences on what I’d want out of a GUI.
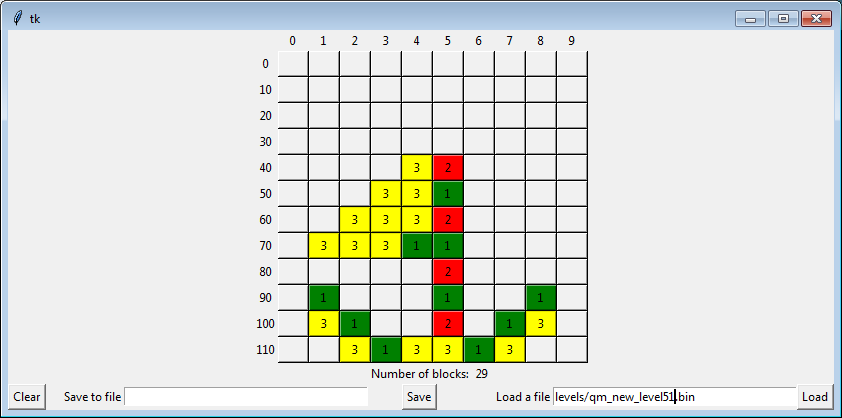
Fast forward about two weeks, and he sends me this:
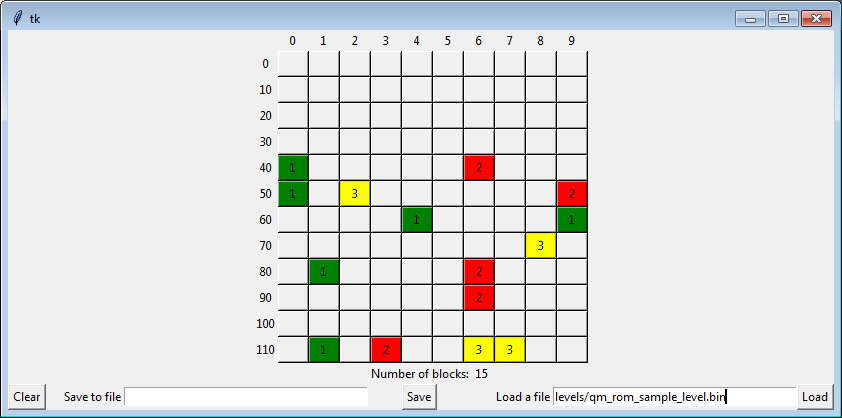
The craziest part? The above app only took 120 lines of code. 120 LINES! That’s insane. If I would have tried my hand writing a native C++ app to do the same, I probably would have tried doing everything myself and needed a thousand lines of code. But he was able to leverage a lot of existing Python libraries and squeeze it all down into a tidy little package. Nice job, Tyler!
Having an app like that could load and save individual levels as binary files with a GUI editor was a lifesaver. It allowed me to do some neat things like this:
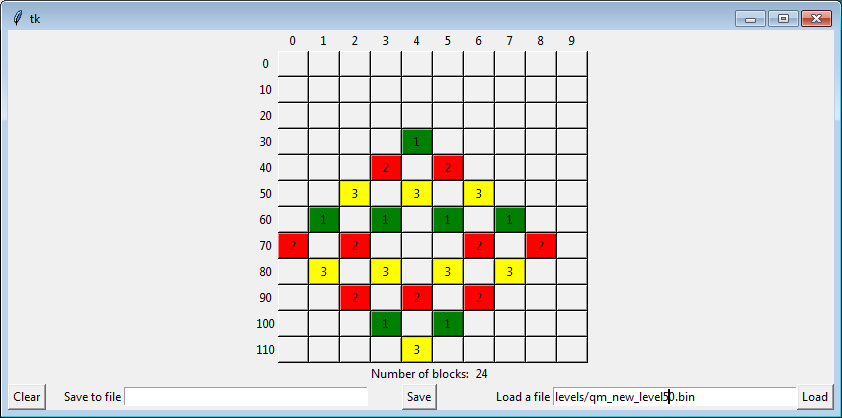
There are more surprise levels, but you’ll have to see them for yourself once the game is released. 🙂
Feature #7: SUCCESS
Through this process, I realized that my style of ROM patching — where I take a ROM file, manually change some bytes, and save it into a new file — was tedious and error-prone. I kept really good notes about what I changed, but inevitably I would forget to record a change or I would make a subsequent change that affected an earlier one. This meant it was actually getting harder to maintain my patched ROM over time. I finally broke down and learned how to use Python to do file I/O, and that helped me keep my sanity while also giving me more flexibility in ROM patching.
Here is what a sample ROM patching script looks like in Python:
#!/usr/bin/python

import sys
import os

# Patch QM with necessary changes

# Clone starting ROM file to new ROM file
sourceFile = open("Quadromania_256_v6.lnx",'rb')
destFile   = open("Quadromania_256_v7.lnx",'wb')
destFile.write(sourceFile.read(257*1024))       # Read 256KB + Handy header
sourceFile.close()
destFile.close()

# Open ROM file to apply patches
destFile = open("Quadromania_256_v7.lnx",'r+b')

# Patch ROM code for StartHSFX_panning_patch
patch = [0x20,0x95,0x98] 			# jsr $9895
destFile.seek(int('0x3e82',16),0)
destFile.write(bytearray(patch))

destFile.close()
Here’s what that code does: you open your source file, copy it to a new working file, then open that working file for modification. Since Python is very fluid when it comes to type declarations, I create a generic patch variable which I decide to use as an array of bytes. This could be a single byte or 100 bytes. I then tell the script to seek to a magic location in the ROM (0x3e82) but since the file.seek() method wants a decimal number, I convert it as a “base 16” number first. I use the bytearray() method inside the file.write() method to write my patch variable at that location. Finally I close the working file. It’s just that easy, and now I don’t have to manually hack ROMs any more!
Next time I’ll try wrap up the remaining features #8-10 for Quadromania. EEPROM support is probably the most interesting out of the list. Until then, happy gaming!